|
    
Interiors:
The North Pole Workshop
| |
|
|
|
|
|
|
|
|
|
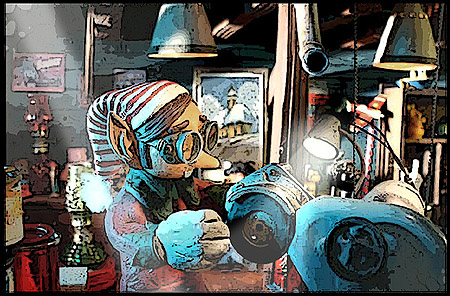
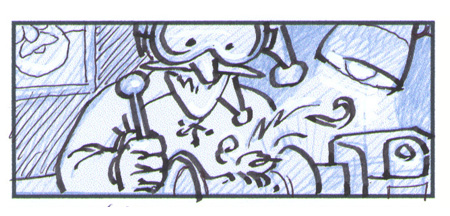
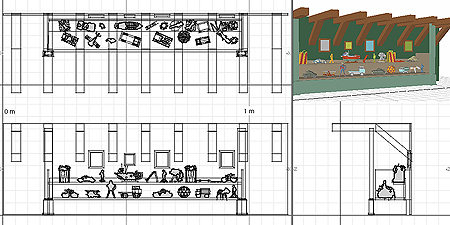
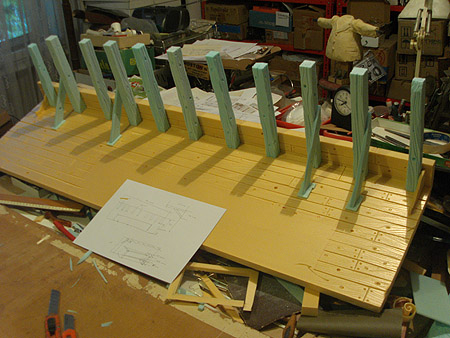
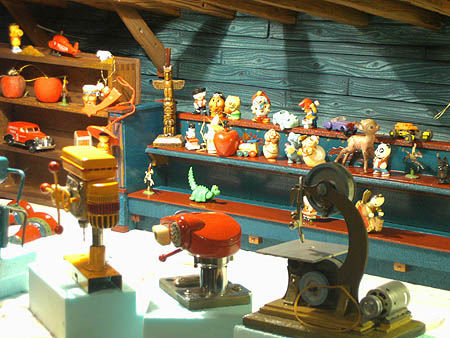
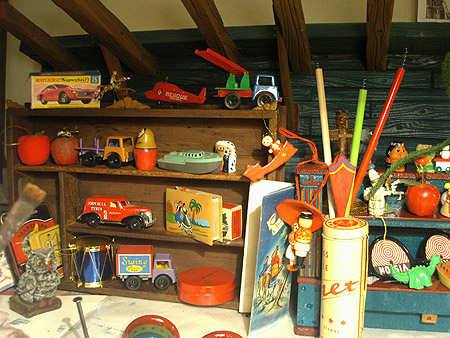
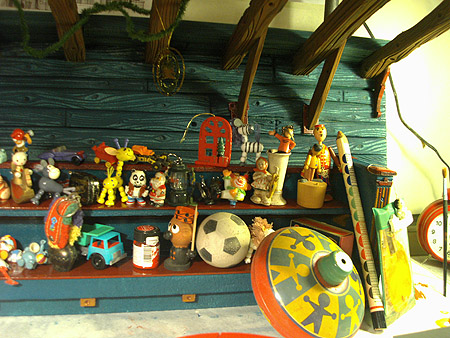
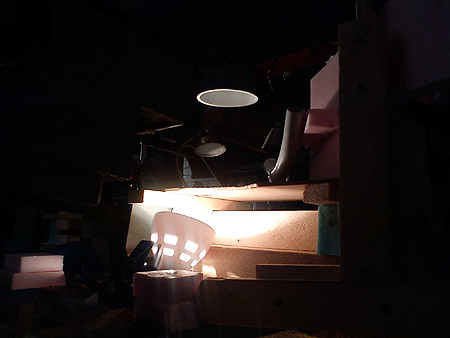
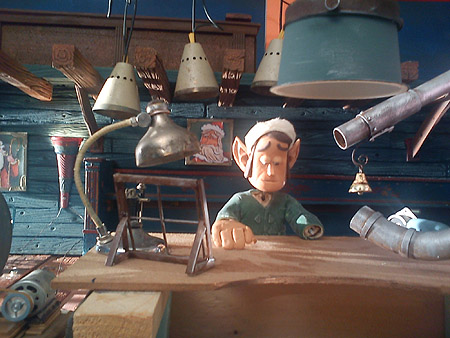
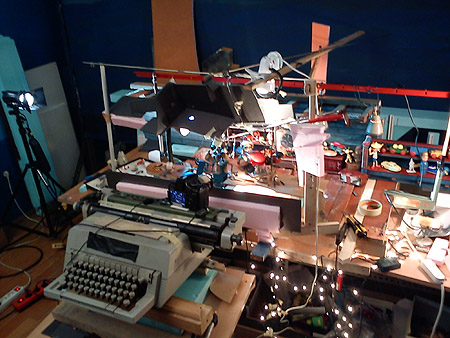
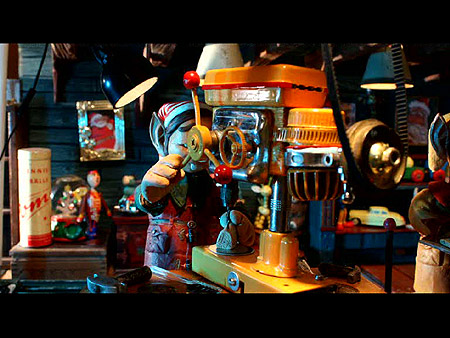
The
background wasn't particularly important
in the storyboard. However, when
working on the 3D animatic, I've
found out I had to fill the background
somehow. So I came up with the basement
concept and this back wall filled
with toys.
|
|
|
|
|
|
|
|
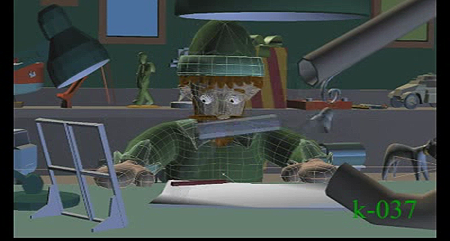
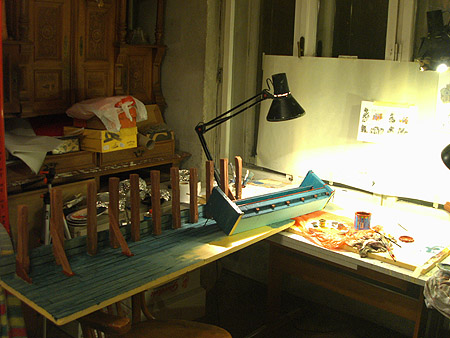
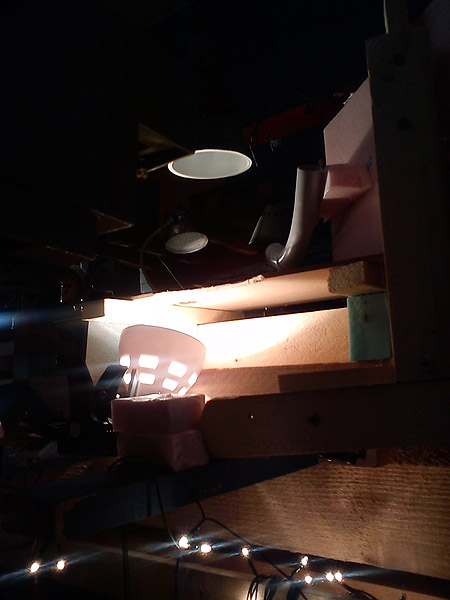
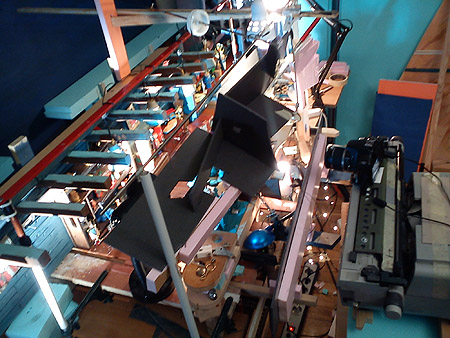
It
was to be situated in the basement
at first, but then I changed the Santa's
lair from a hut to a barge, encaved
in polar ice. So, without any actual
changes to already finished background,
this set finally - to be exact - supposed
to end up under the deck of a barge.
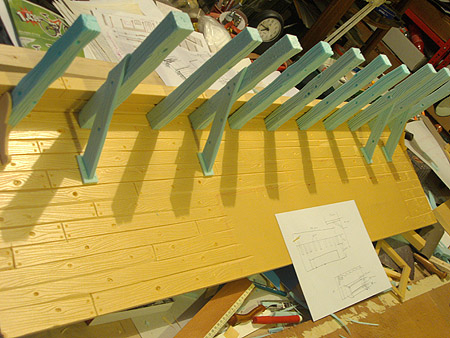
Elongated as it is, the set had struts
on the ceiling from the start, and
they (how convenient) resembled something
that could belong into ship's interior.
However, if that'd be the case, there
should be an array of vertical ribs
of the ship's hull, but I decided
that this ship could be fitted with
a double hull, thus omitting the need
for distiguishable hull ribs. After
all, it wasn't all that important
for the film if it is a barge or not,
moreover - even the exterior wasn't
made to be immediately recognized
as a barge, but rather as a floating
cottage.
|
|
|
|
|
|
|
|
|
|
|
|
|
|
|
|
|
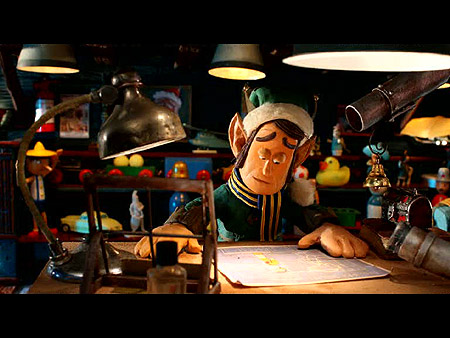
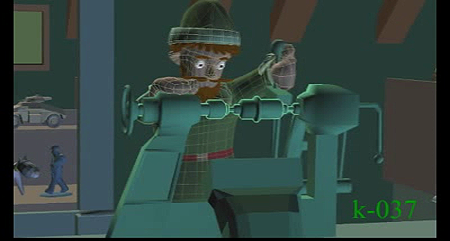
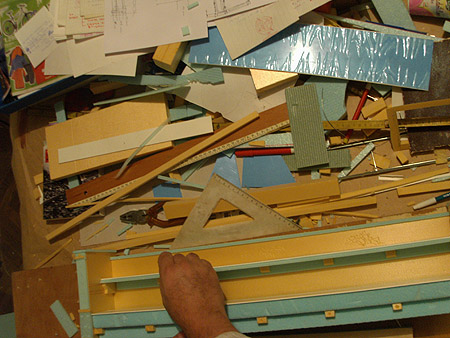
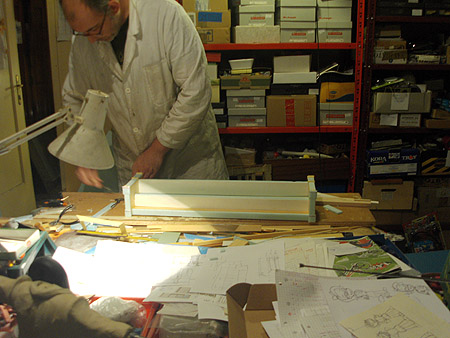
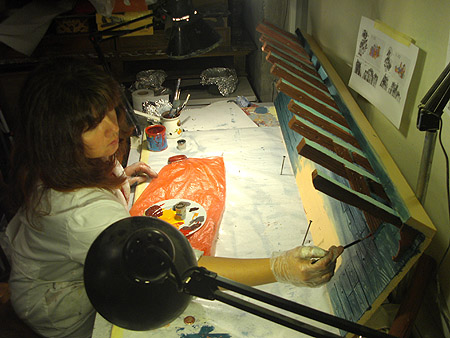
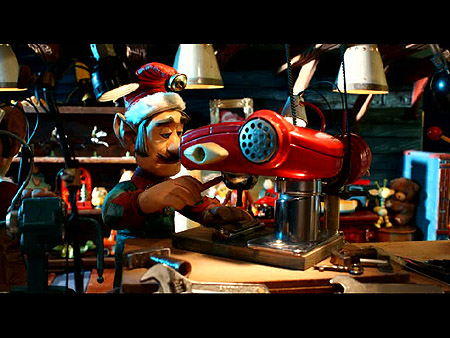
Anyway, the background was already
finished and Sanja painted it. On
tests everything looked ok. It was
only after that I decided to go for
crooked angles in my sets, and begun
reconsidering this one as well. But
distorting it was out of the question
because of the sideways move of the
camera. So, I continued as planned,
but had to find the way to hide plain
geometry of the back wall. I had decorations
for that. It seemed like a simple
solution.
|
|
|
|
|
|
|
|
|
|
|
|
|
|
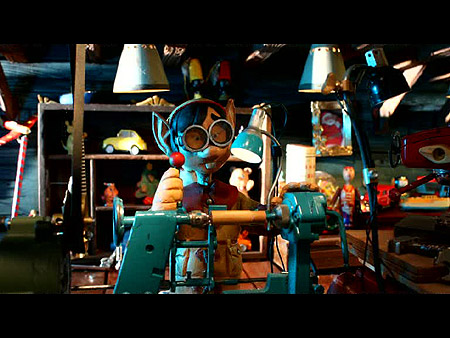
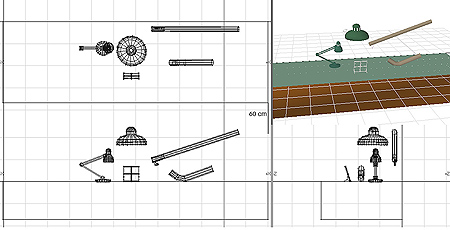
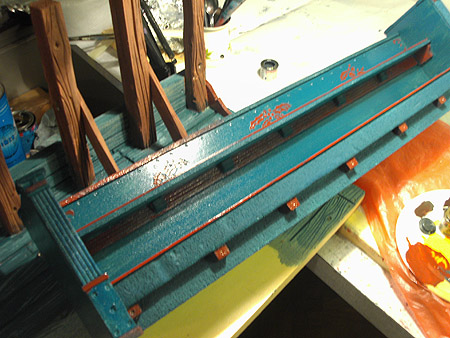
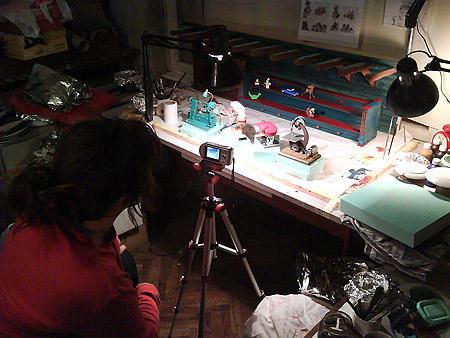
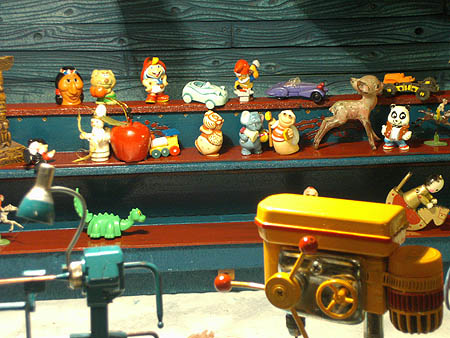
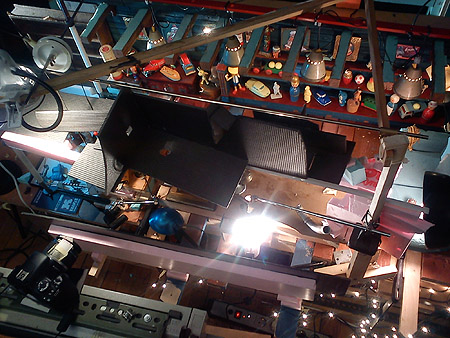
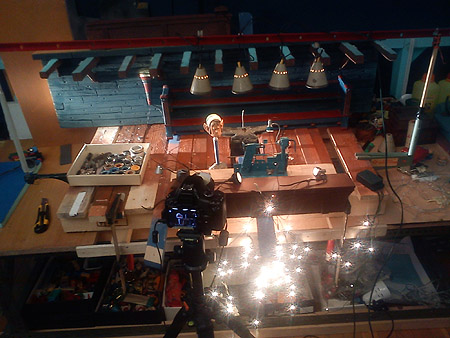
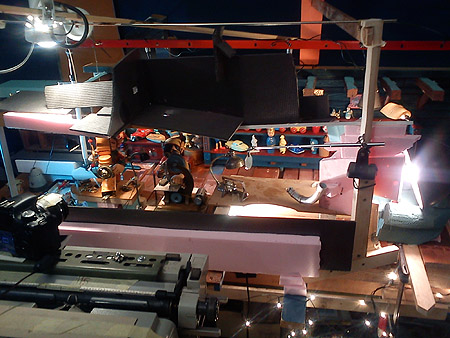
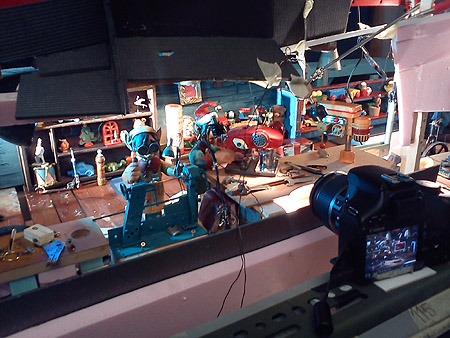
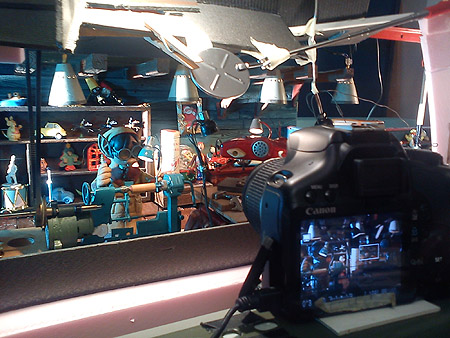
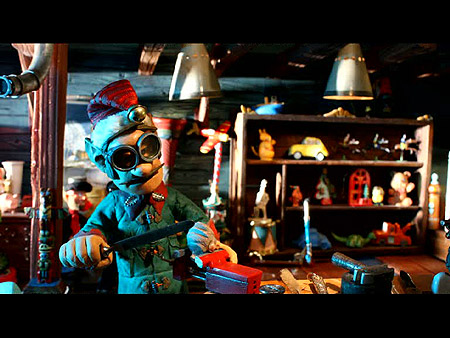
I've
been extremely naive in preparing
for this shot. I thought it'd be possible
to use the same background for the
whole range of the camera move. The
thing is, I've heavily misinterpreted
the animatic's 3D set. It turned out
that in real life I needed more distance
between the camera and the backdrop
so when camera did it's movement,
the wall segment was barely wide enough
to cover the background. That may
seem all very well, but I had several
(nine to be exact) working posts for
elfs. So I had to match "exits"
with "entrances" for every
camera move, in a way not only to
sync movement, but to reconstruct
every single detail in the background
in completely opposite end of that
set piece, just to repeat it in the
next camera move. It has to be, otherwise
transition between clips couldn't
work. Also, the "display"
behind elfs turned out to be several
times longer than expected, so dressing
it a bit different every time became
quite a creative challenge. Above
all, I had to light it, and that introduced
whole new level in adjusting props
for in-set lights, and also top lights,
etc. All in all, I had to repeat the
process eight times. And it all counted
as just one shot. What a mess! Nevertheless,
it was educational. Here's how, from
tests to final shots:
|
|
|
|
|
|
|
|
|
|
|
|
|
|
|
|
|
|
|
|
|
|
|
|
|
|
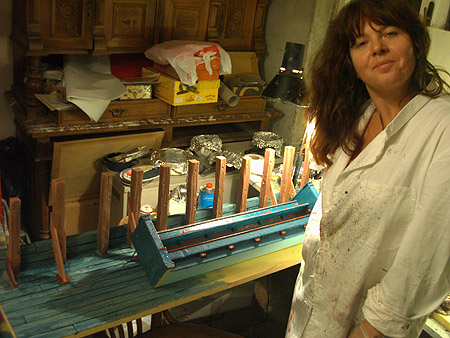
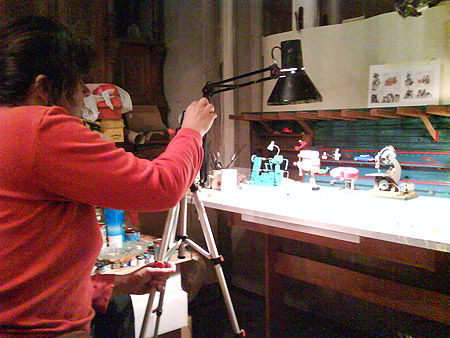
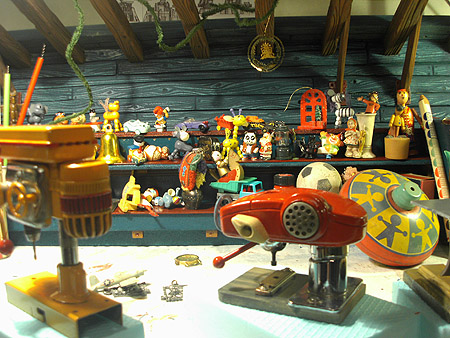
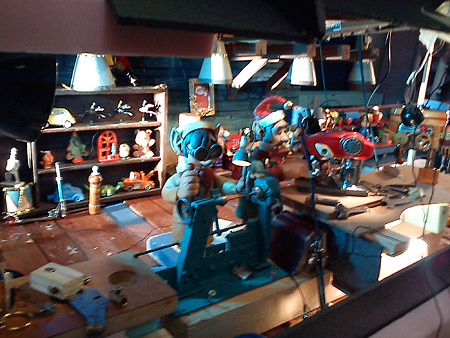
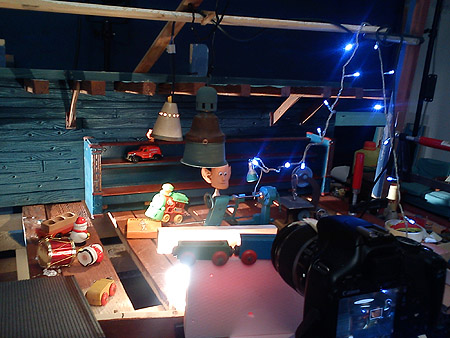
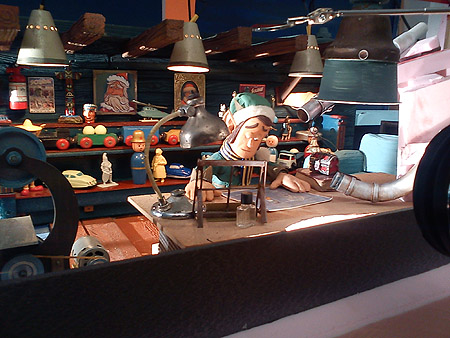
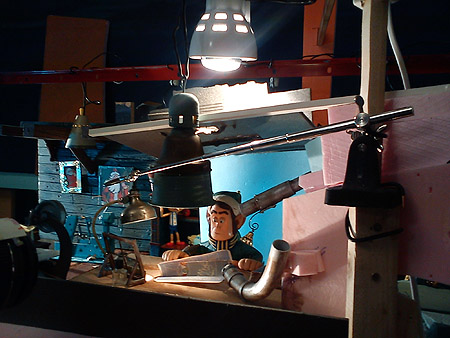
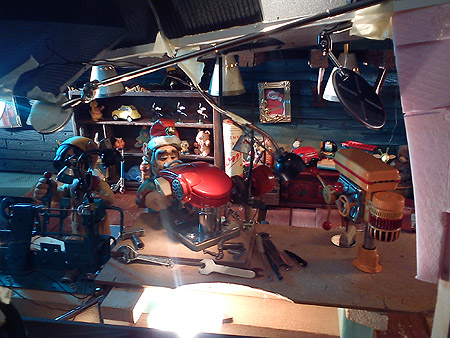
I
shot every frame with chroma-key screen
of some colour (this one above was
obviously blue, but there were situations
where I had to go with two or more
colours) between foreground and background.
With all the lights (and masks for
some of the lights) in the set, guides,
railings, telescopic mirrors and all
sorts of rigs, there was hardly any
room for my hands to handle the puppet
and whatever else needed to be animated,
let alone the space for chroma-key
screen. But I had to squeeze it in,
somehow... I wasn't aware of it at
first, but I had to adjust everything
nine times... for just one shot!
|
|
|
|
|
|
|
|
|
|
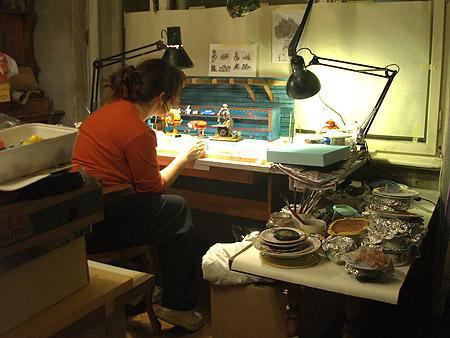
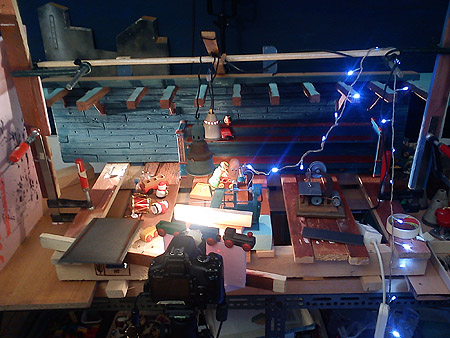
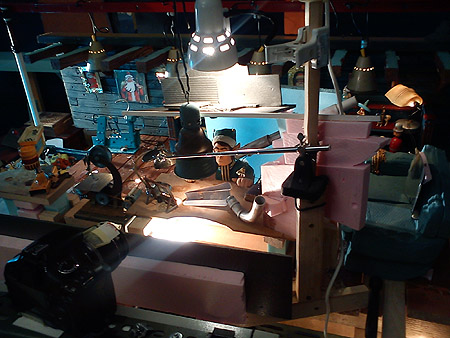
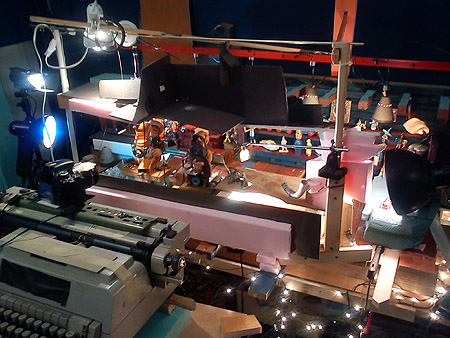
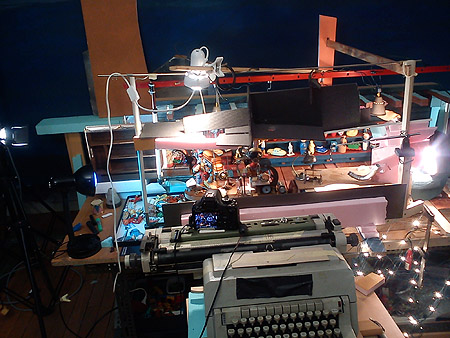
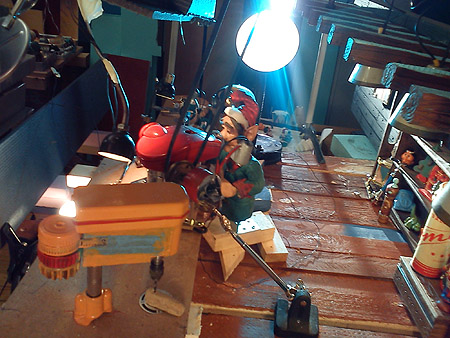
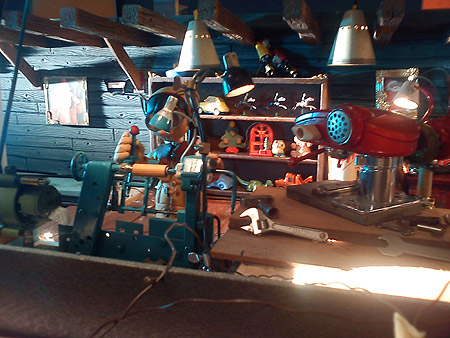
I
had to fasten the machines for every
change, and I needed every time
the one that's going out of the
frame, as well as the one that goes
in. I wasn't like I enjoyed it...
I hated it, but it had to be done.
I had no idea that would be so complicated...
If I did, I'd do it all in one row,
with one long background (for that,
I'd have to build several more meters
of background) and shoot the whole
thing down the longer wall of the
studio, but none of that would be
as time consuming, as this approach
was in the end. But, I only started
to realize some of that out when
I was already way ahead and over
and done with the first puppet,
and deeply in the preparations for
the second one... If I decided to
change anything, I'd have to reshoot
the first puppet, and I wasn's too
keen on that proposition.
|
|
|
|
|
|
|
|
|
|
|
|
|
|
|
|
|
|
|
|
|
|
| |
| _1
The ARCTIC PIRATE index |
| _2
Color chart development, coloring and
light tests |
| _3
Storyboards, shooting plans, concept
arts, sketches |
| _4
Puppets, from sketches to animation |
| _5
Vehicles of all sorts |
| _6
Houses and exteriors, from sketches
to final sets |
| _7
Interiors: 7-D
- The North Pole Workshop |
| _8
Small props |
| _9
Graphics and maps for posters, banners,
press, signs etc. |
| 10
Shots against all odds |
| 11
Simple shots, confined spaces |
| 12
Basics: workbenches, tools, logistics,
etc. |
| 13
Miscellaneous |
| |
|